Drawing hair can be a challenging task for many artists. Achieving realistic and detailed hair in your artwork requires understanding the intricacies of various hair types, textures, and styles. In this comprehensive guide, we’ll take you through the process of drawing hair step by step, sharing valuable tips and techniques to help you master this essential skill. So, let’s dive in and unlock the secrets of how to draw hair flawlessly!
Before we delve into the specifics, let’s cover the fundamental principles of drawing hair:
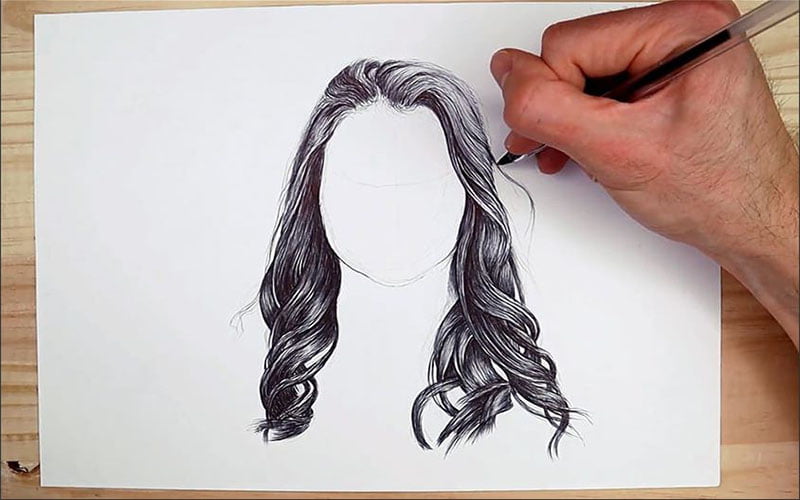
Now that we have covered the basics, let’s explore a step-by-step process to create stunning hair in your artwork:
Before diving into the hair, outline the head’s basic shape and establish the hairline. This foundation will guide you in creating the hair’s flow and direction.
Identify the hair type you want to draw. Is it straight, wavy, curly, or coiled? Understanding the hair type will inform your drawing approach.
Using light and loose strokes, block in the overall mass of the hair. This step will help you define the hair’s volume and general shape.
Start adding individual strands of hair. Use your observations to replicate the way hair falls and the direction it follows.
To add realism, identify the light source and create highlights and shadows accordingly. This will make your hair drawing more three-dimensional.
Refine your drawing by adding more details and adjusting the shading. Use blending tools to smooth out any harsh lines and create a seamless appearance.
Even experienced artists can make mistakes when drawing hair. Here are some common errors to watch out for:
Applying excessive shading can make the hair look unnatural and heavy. Opt for a more subtle approach to achieve a realistic effect.
Hair has a natural flow and direction. Neglecting this aspect can result in unrealistic and awkward-looking hairstyles.
Ensure there is enough contrast between highlights and shadows to make the hair pop and add depth to your drawings.
A: To draw realistic hair, observe real-life hair and pay attention to details like texture, flow, and highlights. Practice regularly to improve your skills.
A: Using a range of pencils, from 2H for light shading to 6B for dark tones, allows you to achieve better hair texture and depth.
A: Yes, but erasing guidelines will enhance the realism of your drawing. Use a kneaded eraser to gently remove unwanted lines.
A: To draw various hairstyles, study hairstyle references, and focus on the unique characteristics of each style, such as volume, texture, and shape.
A: To add highlights, leave some areas of the hair untouched while shading. This will create a natural-looking shine and dimension.
A: To achieve a glossy or wet look, enhance the highlights and make them more prominent, as if the light is reflecting off the damp hair.
Drawing hair is an art that requires observation, practice, and attention to detail. With the tips and techniques provided in this comprehensive guide, you can elevate your hair drawing skills and bring your artwork to life. Remember, mastering hair drawing takes time, so be patient with yourself as you continue to improve. Embrace your creativity, and don’t be afraid to experiment with different styles and textures. Now go ahead and create stunning hair in your art with confidence!
Recommended other topics: Drone Camera-Capturing the Skies from a New Perspective


© InfoDoot. All Rights Reserved.